Back in January 2014, one of the most influential person in my life "Daya", my manager at Barclays and an amazing techie, casually discussed the idea of installing a computer in cars (mind you, he is very much into cars). The idea struck me so much, that here I am writing a post at an early hour in the morning to help out those who get inspired to do the same now. The drive to write this came from a successful power test last night.
Important: this has worked for me, so I see this as a lay-mans guide to setup a CarPC. Your needs may be much more complex then mine, so you may have to serach the web for clearer instructions
The Idea
As I am a windows oriented engineer, so my first & only thought was to have Windows 7 or above based system. At this time I am inclined towards writing my own interface on WPF, so the choice of a Win based system made more sense to me.
Features:
Although, vision was to have awe striking visuals and features in my car, that it beats the likes of Bond cars. However, hardware unavailability is a big reason to stick with basic stuff as of now. Note that this will be an ongoing upgrade
- Capacitive Multi touch display 10.1 inch
- All round view camera system
- GPS navigation
- Audio/Video Player
- Web Browsing
- Phone call (GSM) and messaging
- OBD diagnostics
- DVR with drivers pov
Hardware
Aliexpress came in handy for ordering all the cool stuff. Although shipment takes a lot of time (in weeks to months) to reach, big reason that the CarPC is not complete yet. Anyways, here is the actual hardware list with prices:
- Feelworld 10.1" capacitive monitor (INR 13k + INR 3k Fedex Customs duty)
- LCD based monitor - not so great display, L/R/U viewing angles are fine. Down angle is poor, but who cares.
- Pros: HDMI input, plug n play - no drivers needed
- Cons: proprietary SKS cable - availability is unknown
- Gigabyte H97N-Wifi motherboard (INR 9.5k - got from local store)
- H97 chipset, mini-ITX form factor, LGA1150 socket
- Pros: 3 displays supported (2 HDMI + 1 DVI), Wifi + BT 4.0 micro PCI card on board, more USB 3.0 exposed than 2.0
- Cons: Cost (I would have loved to get it for free)
- Intel Core i3-4150 processor (INR 7.5k - local store)
- 4th Gen, Dual Core - hyperthreaded
- Pros: okayish TDP - 54Watts, HD Graphics 4400 (could not get 4600 in this price), 3.5 GHz, comes with heat sink
- Cons: wish - intel had quad core cpu with HD 4600 graphics with lower price tag
- Corsair Vengeance 4GB (INR 3.5k)
- 1600 Mhz, with heat sink
- Pros: using these for over an year, no complaints
- Cons: make them cheap
- Intel 520 series SSD 120GB (INR 7k)
- This came as lack of option with seller, I wanted Adata or Crucial.
- Pros: Anandtech review says fastest sandforce drive
- Cons: scared about BSOD
- M2-ATX PSU (INR 4k + INR 1k Fedex customs duty)
- 160w capacity, about 95% efficiency
- Pros: DC-DC supply, automotive grade, wide input range
- Cons: chinese instruction manual is no help
- ELM 327 OBD-II mini scanner (INR 350)
- car diagnostic data reader
- Pros: compact size, Bluetooth operation (wire-free)
- Cons: have not tested it so much to find one
- DC DC buck boost converter (INR 800)
- Will be used to provide consistent volt/current to cameras
- Pros: compact design, clear instructions, 7 segment display on IC for voltage
- Cons: max 35 w (3A) output limits application
Future Add-ons
- CCD sensor based camera with IR LED night vision (front + back)
- Regular/4 IR led ccd camera for sides
- HD WebCam (usb) for DVR/Skype from Car
- 3.5mm jack Microphone - Voice controls/Calling
- Huawei/Micromax GSM+3G usb adapter with Voice calling
- USB GPS receiver - globalSat BU354SB
- USB temperature sensors
- Satellite TV receivers
- bigger displays for back seats
Getting Started
Wiring M2-ATX
Believe me, this is the most undocumented part of the process. Though carmp3 forum has a pdf which helps to some extent. But it took me several hours of experiemental trials to get the mobo powered up. Please refer to the diagram:

Yes, dont be amused to see 2 battery positive (red wires) going to 1st & 2nd pins. The 2nd (middle) pin represents the car ignition. You will first have to connect, 1st Pin and 3rd Pin to +ve and -ve terminals respectively. Then connect the middle pin to the battery positive and it will simulate ignition, turning on the motherboard (off-course you will use both 20 Pin ATX and 4 pin ATX to connect the mobo).
I will post actual photos once I am done with my setup. Going on a hunt for a plexiglass/acrylic cabinet.
[Update]
Just finished wiring up the CarPC at home. Biggest challenge now is to decide a place for the cabinet and how to mount the Display. Wait, err did I say cabinet? Arrrgghh... I gave up my secret. Yeah finished making (destroying) one too. I actually wanted a transparent cabinet (search for acrylic cabinets and you will know what I mean). However, wasted a day last week and about INR 800 (US $15) on getting an acrylic one made from a local fabricator.
Lessons learnt:
1. Local fabricator sucked real bad
2. Plexiglass/Acrylic is not a good choice for cabinet (if made) due to sheet thickness (cant use screws)
3. Only if the fabricator has laser cutting precision then the chances are to get a neat finished product
I ended up having a cabinet which looked like a Shoe Box and was broken (sheet tears) at several places:

Iron L-bars were used for rigidity to the structure (ugly)
Sythetic/rubberised glue was used to paste the sides together (ugly white spunk)
Hole at the top face (for a 120mm fan) cause a crack in the sheet. (ugly)
Cabinet
Fortunately, found a perfectly sized plastic container box (kitchen/stationery) which is now my car PC case. I bought 2 boxes just because something in me knew I would damage the first draft.
And yes I did that. I had to heat cut (actually melt my way around) the box to make it usable.
I used wire tags to tie up the components. See image below.

Yeah, used the stickers that came with SSD and Processor to beautify the box. I know the slots are not neatly cut but anyways this is going to hide either under the seat or in the floor well.
This is how the system will look (if used as desktop). Remember, screen is a 10.1" one and so is the cabinet.
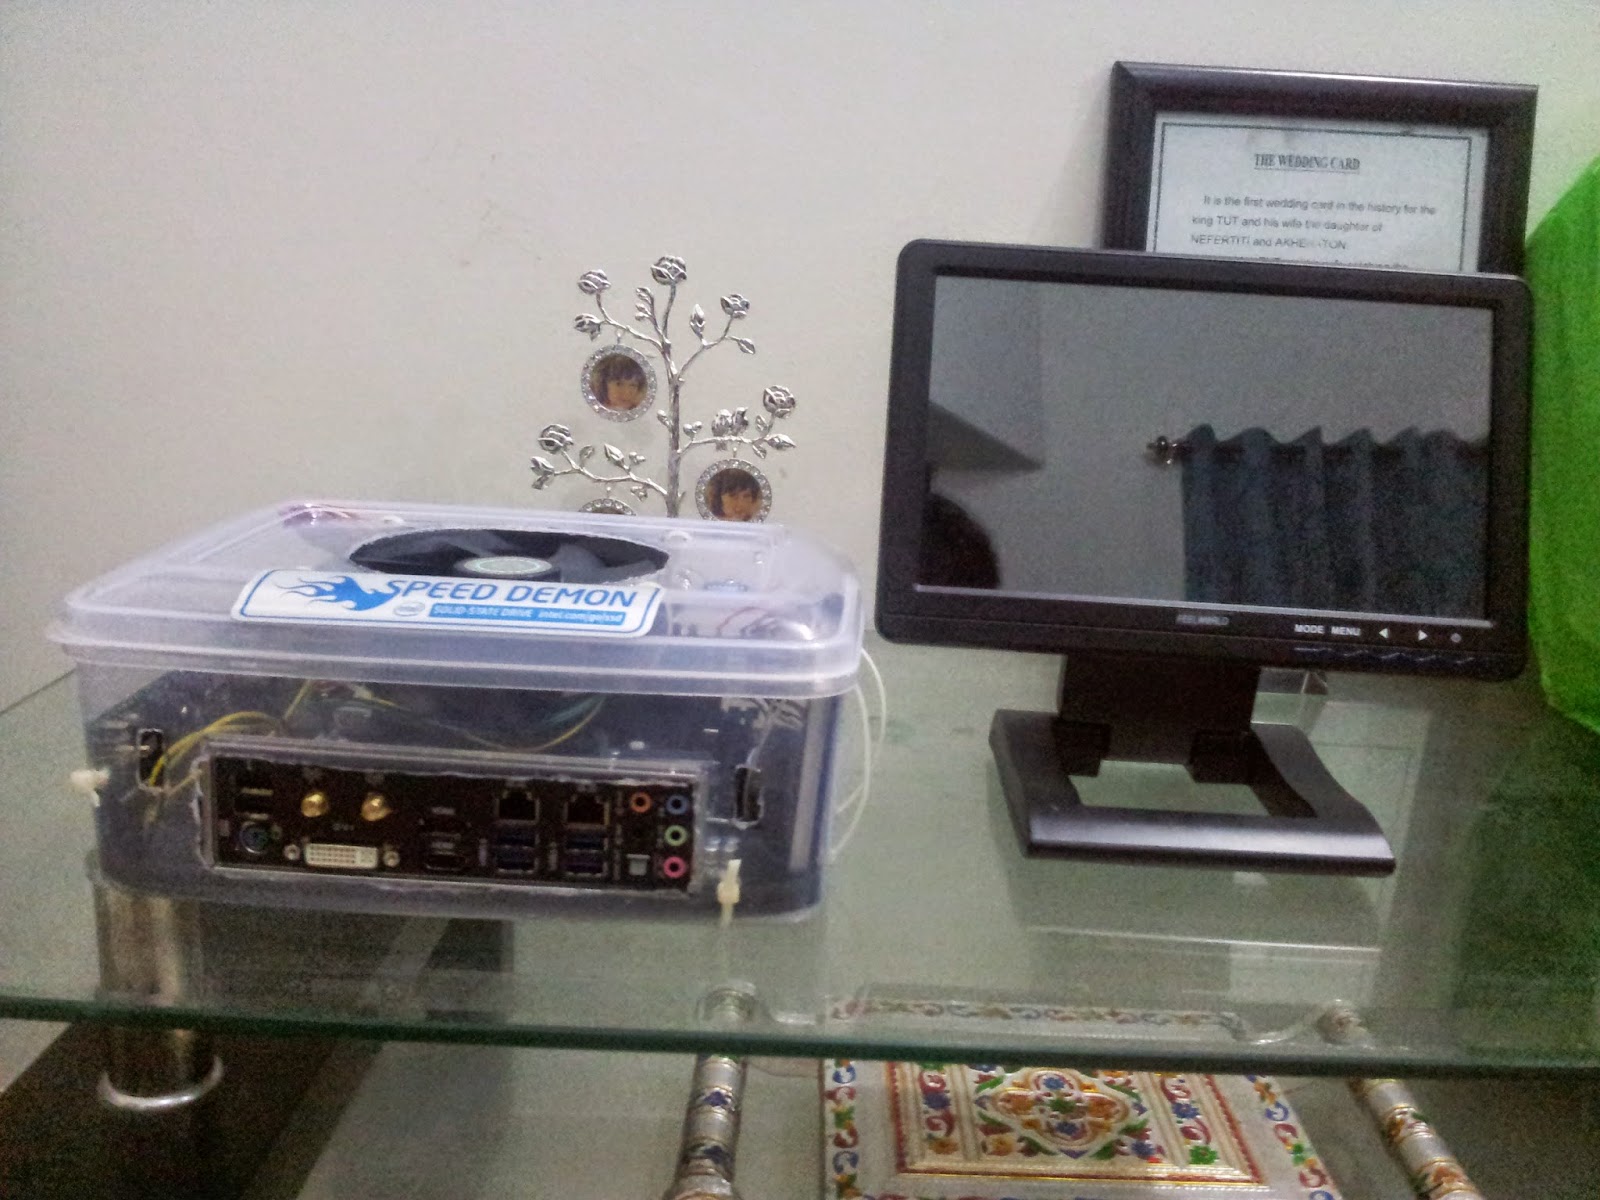
I used the buck boost converter to stabilize the voltage input to the monitor, tested it to work with the battery, BB circuit set to output 12V. Its an amazing piece of circuitory as the voltage levels vary between 11.9V - 12.1V only. Kind of steady.

I then took some time to connect the entire thing, powered by the battery.It worked.
Will upload the first boot video on youtube and link here.
Whats on mind?
1. Must find a way to wire up Front panel Audio (3.5mm Headphone jack and mic jack)
2. Need to find a talented mechanic to wire up this to my Car
3. Top of them all, need to finalize where to mount the display and where will the cabinet go. (Boot is not a good option as wire lengths will increase. Under seat is causing a little discomfort to rear seat passengers)
4. Minimal cut/screw/bolting the Dashboard and car for installing this
Reverse Parking Camera is still missing. Damn!! you manufacturers. Why you no make good camera's.